Category: Concrete Services

Choosing Driveway Pavers

Choosing the right driveway pavers will help you create a high-end aesthetic that enhances your home’s curb appeal. To start, consider your architectural style and choose a material that fits with the look you are going for.

Driveway Pavers Long Island are the most durable option for a driveway and can handle heavy vehicle weights without shifting or cracking. Brick and cobblestone are also options, but require a much thicker base to prevent soil shifts.

Block Paving Leicester & Driveway Landscaping for Leicestershire

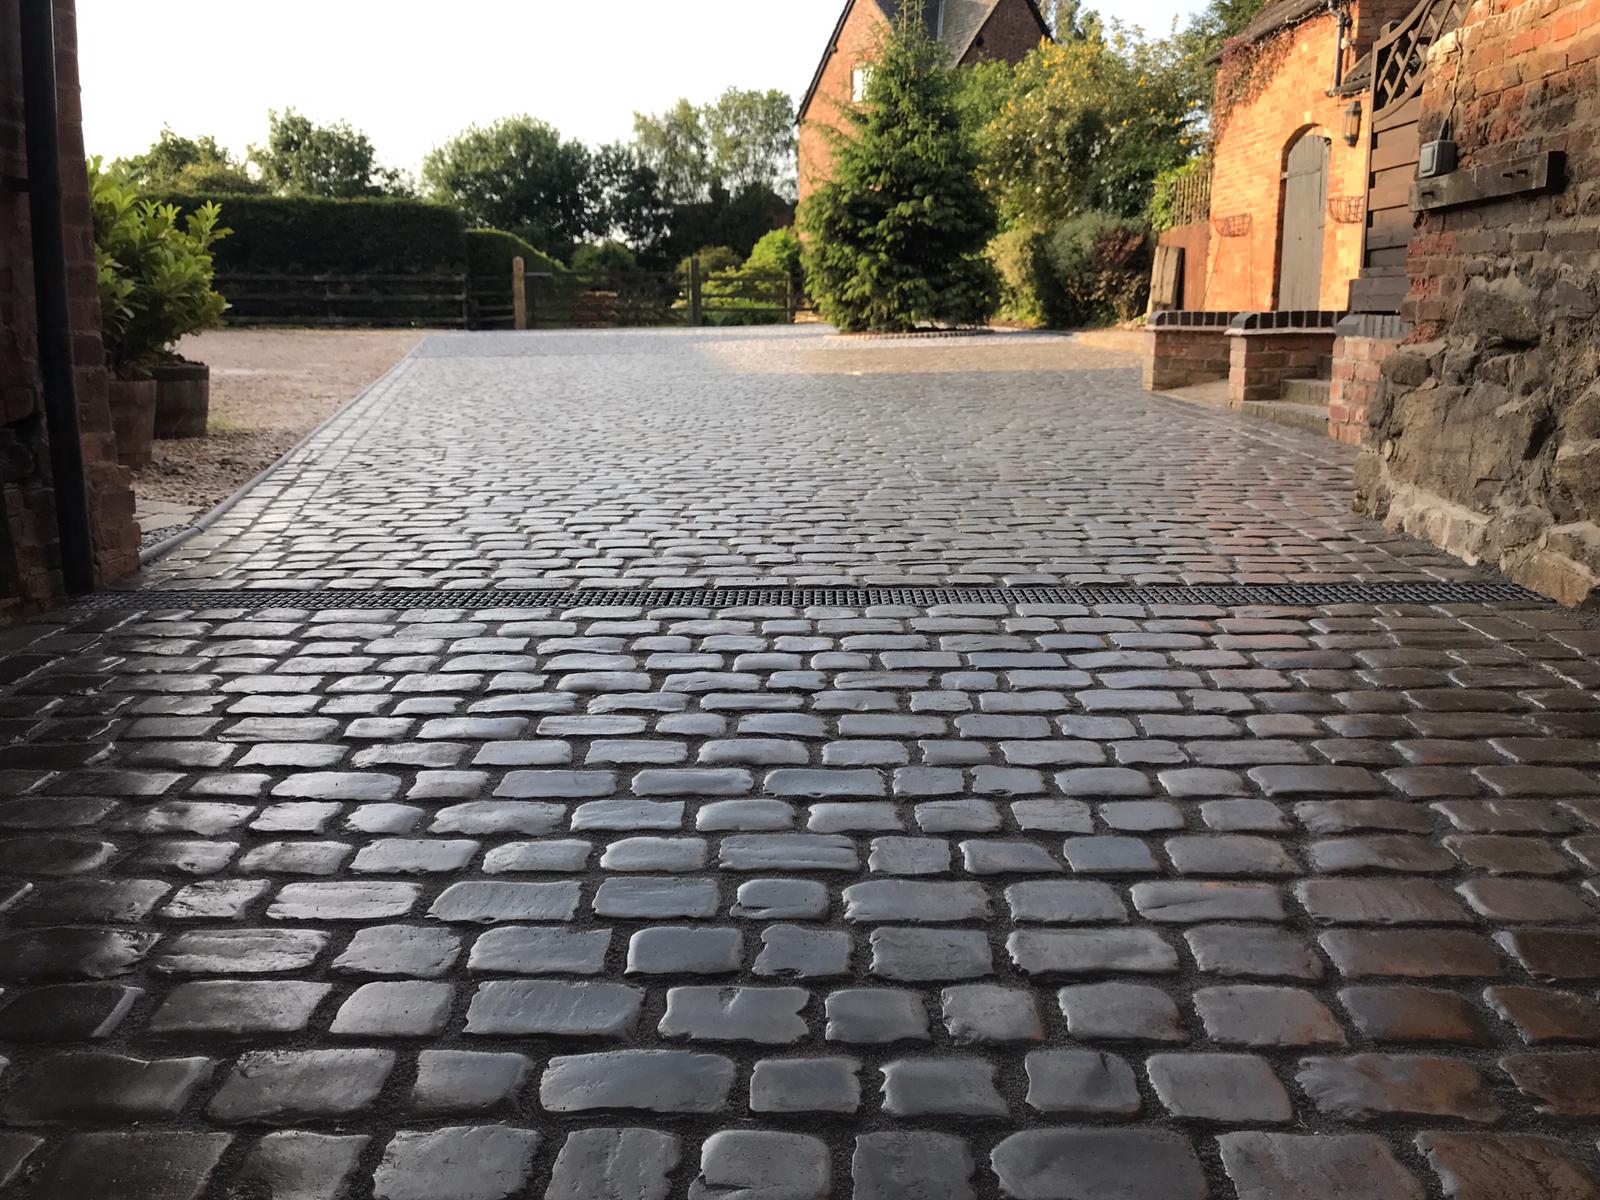
If you’re in the market for a new driveway or want to improve your current one, pavers are an excellent choice. They are highly durable, able to carry more weight than traditional poured-in-place concrete or asphalt. In addition, they offer a wide range of design possibilities to meet every aesthetic desire and budget.

While there are several different types of pavers, the most popular for driveways are made from clay brick or concrete. Both of these options are known for their durability and resistance to cracking. They can be crafted to achieve any look from classic to modern, and they can also provide a permeable surface that allows water to flow through to the soil beneath.

Pavers are also a good option for high-traffic areas because they’re not as prone to shifting and breaking as poured concrete. However, if you’re planning to drive on your paver driveway, it’s important to choose the right material and have it installed correctly. If your pavers aren’t properly prepared, they’ll break under the pressure of vehicles and sink into the underlying soil.

Unlike poured concrete, which is unable to shift or crack with changes in the weather, pavers allow for movement by allowing space between each slab. This means your driveway can withstand thawing and freezing without damage.

In addition, pavers are easy to repair. Should tree roots or frost heave cause a section of your driveway to shift, it’s simple to remove the affected pavers and replace them. In comparison, repairing a poured-in-place concrete driveway is a much more involved process and can cost significantly more.

While paving stones are typically more expensive than other types of driveway materials, their longevity and beauty make them an excellent investment for your home. With proper installation and care, a paver driveway can last upwards of 40 years.

When it comes to maintaining a paver driveway, weed control and regular cleaning are essential. Because weeds can grow in between the individual pavers, they must be regularly removed to prevent them from disrupting the surface. In addition, a routine sealant application helps protect the pavers from staining and the effects of freeze-thaw cycles.

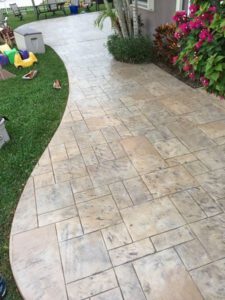
Concrete pavers offer endless design possibilities for enhancing the overall aesthetic of your driveway. Available in a variety of shapes, sizes and colors, they can be arranged to complement the architectural style of your home as well as the landscaping. In addition, pavers can be designed to mimic the look of natural stone or brick for a high-end and sophisticated aesthetic.

When selecting pavers for your driveway, consider their aesthetic as well as their durability. Choosing a driveway paver with a textured finish will be more forgiving when it comes to automotive spills, oil spots and other stains that are common on driveway surfaces. Pavers with a tonal variation in color will also be more forgiving and help camouflage these marks over time.

The size of your driveway and the type of aesthetic you are going for will determine the thickness and paver shape you need to achieve the desired look. For a standard residential driveway, it is recommended to use pavers that are at least 40mm thick in order to handle the weight of vehicles of all sizes. For permeable driveways, it is preferable to use 30mm thick pavers to allow grass and other plants to grow between the pavers.

Once you’ve determined the type of driveway and paver thickness that is best for your project, you can then start to consider the various design options available. One of the most popular paver driveway designs is herringbone. This zigzag pattern creates visual appeal and can be enhanced with the use of different colors. Another eye-catching option is the basket weave, which also offers an attractive allure.

Lastly, you’ll want to consider the running bond pattern. This is one of the most traditional interlocking paver patterns, and it’s easy to install, requiring little cutting. This is a good choice for driveways with longer lengths and straight lines, as it will provide a uniform look.

Finally, you’ll want to consider whether you want to incorporate a circular or other unique paver layout. This can add an interesting element to your driveway while also directing attention towards your entranceway.

Driveways made of pavers are a more environmentally-friendly alternative to traditional concrete or asphalt pavements. The reason for this is because driveway pavers allow rainwater to penetrate into the ground underneath, which helps reduce stormwater runoff and flooding issues. Many cities enforce land-use codes that limit the amount of impervious surface area on a property, and incorporating permeable pavement is an effective way to help reduce this.

When you choose to install a paver driveway, you can select from an array of different colors and styles. These choices give you the opportunity to create a truly custom design, which is great for adding curb appeal and making your home stand out. In addition, you can opt for a pattern that adds more character to your driveway, such as a herringbone or basket weave.

Another eco-friendly aspect of driveway pavers is that they are made from recycled materials. This is true of both the material itself and the process used to make them. In addition, pavers are much less carbon-intensive than poured concrete.

Pavers are also a more eco-friendly choice than gravel or traditional asphalt, which require extra excavation and labor to install. They are also more durable than poured concrete, which can crack or break with temperature shifts. Since paved surfaces can be a lot more expensive to repair, you want your driveway to last for as long as possible.

Driveway pavers are made of interlocking pieces that form a solid surface, and they can be laid in a variety of different patterns to create the desired look. These paving stones are typically made from natural stone, recycled plastics or other sustainable materials and designed with gaps between them to enable water absorption. This reduces the strain on local stormwater management systems, which can lead to flooding and pollution problems.

Permeable pavers allow stormwater to enter the soil beneath, where natural microorganisms will break down any pollutants and purify the water. This process also prevents the stormwater from flowing into local lakes and rivers, which can cause pollution issues. The permeability of driveway pavers also allows the homeowner to save money on de-icing salt, which is a costly and harmful substance for the environment.

A paver driveway can be an attractive and functional addition to your home. However, it must be properly maintained to ensure the longevity of its appearance and structure. A regular cleaning schedule, along with occasional professional cleanings, is essential for maintaining the integrity of your pavers. This will minimize the need for major repairs and ensure that your pavers continue to look their best.

Regular sweeping removes dust, dirt, and debris from the paving bricks. This prevents weed growth and helps keep the bricks looking clean. When necessary, the bricks can be raked or power washed with a pressure washer. The power washer should be kept on a low setting and not too close to the surface of the pavers so as not to dislodge or wash out the bedding sand underneath the pavers.

If stains persist, it is advisable to mix a solution of detergent and water, then use a brush to scrub the pavers and rinse thoroughly. This process may need to be repeated for tough stains.

Once the pavers are cleaned and dry, they can be resealed. The sealant protects the paving bricks from the normal wear and tear and also helps to preserve their colors. It is a good idea to reseal the bricks at least once every 2-3 years.

While pavers are the longest-lasting paving material, they do need some maintenance to keep them in top condition. Fortunately, this maintenance is simple and relatively inexpensive. Repairing a crack or other damage is not difficult with pavers, and the interlocking system makes it easy to replace damaged bricks.

Keeping the weeds at bay is also important for a paver driveway. Weeds can grow between the bricks and pull them apart over time. To avoid this, the weeds should be killed or prevented with a weed killer or a weed prevention product. The spaces between the bricks should be filled in with polymeric sand which will help the paving stay in place and prevent weed growth.


What to Look for in a Dock Builder

Mountain Island Lake Dock Builder must understand water dynamics, engineering principles, and local legal regulations. They also must use top-quality materials that can withstand constant exposure to the water and harsh aquatic conditions.

They will install docks with permanent methods for climates that don’t experience winter ice and removable docks in areas where it is an issue.

Create Your Dock - Secured Dock Builders

A dock builder’s experience should be an important factor in hiring them for your project. An experienced professional will be able to provide you with the best service and quality. They will have the skills to handle all aspects of your dock construction and installation. They can also answer any questions you may have during the process. It is important to know how long they have been in business and what their previous customers have had to say about their services.

A professional dock builder should have extensive construction industry knowledge, including building codes, engineering, and blueprint reading. They should also be familiar with various power tools, including welding equipment and oxy-acetylene torches. A dock builder’s job is very physical, and he often works in difficult weather conditions. They must also be able to lift and maneuver heavy materials, including piers, posts, and decking.

In addition to building docks, many professional dock builders perform other construction work on marine structures, such as retaining walls, seawalls, boat docks and ramps, and ferry terminals. These projects can include shoreline stabilization, piling driving, boat lifts, and repair work on docks, piers, and bulkheads. They can also be responsible for obtaining dock/shoreline permits and providing consultation on designing marine structures.

While you can choose many materials when building your dock, wood, steel, and composite are the most durable. Each type of material has its advantages and disadvantages. Timber, for example, is lightweight, allowing you to add additional features, like seating and railings, without increasing the overall cost. Steel is strong and can withstand most environmental elements. It’s durable and rust-resistant, which makes it ideal for use in areas with harsh weather conditions.

Before construction begins, ask your dock designer how they plan to protect your property during the build process. They should be able to explain what steps they will take to ensure that your landscaping and yard are protected and that the dock’s access is safe for trucks and other equipment. It would help if you also asked them how they will deal with any unforeseen circumstances, such as changes in the weather or tidal conditions.

If you’re planning to build a dock on your waterfront property, finding a professional with the right experience is important. You should always check the builder’s website for previous projects and ask about their knowledge of the type of project you want. Then, you can feel confident that the company will be able to handle your project from start to finish.

A skilled and certified Dock Builder will have extensive knowledge of construction methods and materials that are safe for the environment and your property. They will also know how to work with power tools and welding equipment, including oxy-acetylene torches. They will also be able to read and interpret blueprints to understand the exact specifications of your dock project.

Most dock builders complete a three- or four-year apprenticeship program with classroom and hands-on training. During this time, they will receive training from experienced journeymen and industry experts and be taught to use the latest tools, technologies, and installation methods. In addition, they will be expected to take Occupational Safety and Health Administration courses and standard first aid and CPR.

Some states and areas don’t require a permit to construct a dock, but many have specific regulations to follow. Determining your local laws, township rules, and homeowner association (HOA) requirements is important before you begin construction. Your professional dock builder will be able to help you navigate the permitting process.

Whether your dock is supported by pilings driven into the bottom substrate (fixed), floating on the water surface, or cantilevered over the water, most states have specific requirements that must be met. For example, some require that you perform a bathymetry study to ensure that the waterbed is suitable for building upon or that you have an engineer complete a geotechnical analysis.

Residential floating dock(s) that are 200 square feet or less in size and associated pilings are compatible with agency policies and land use regulations and, therefore, qualify to be reviewed under a Standard Activity Permit. You will still need to apply with a site conditions map and a property/site survey of your proposed structure. For additional information, see DEC’s Application Checklist for Dock Projects.

Whether you are a residential homeowner wanting to safeguard your private dock from damage or own and operate a commercial marina or fishing dock, having boat dock insurance is a wise decision. However, securing the right policy can take time and effort as it must be tailored to meet the specific needs of your property. To make the process as simple and efficient as possible, you should work with an independent agent who can help you determine what coverage is available for your dock.

In most cases, you can obtain coverage for your dock by adding it to your home’s homeowner’s policy through the “Other Structures” coverage feature. This option covers structures that are detached from your primary residence and can also include such things as sheds, pools, and fences. However, it is important to note that this option does not cover flood damage. Additionally, you may need to get a separate flood policy to protect your dock if it is in an area prone to flooding.

The constant assault of seawater takes its toll on a dock, especially if it is constructed from wood. This wear and tear can cause the structure to deteriorate and leave it vulnerable to further damage during severe storms. For example, high winds can create extreme wave action that can rip the dock apart and flip or ram boats into it.

If you are a commercial property owner, you will need a Commercial General Liability (CGL) policy to ensure you can meet your legal obligations in case of an accident at your dock. For instance, if a slip owner is injured by faulty equipment or the dock collapses due to improper construction, you could be liable for medical bills and other damages. In addition, a CGL policy will typically cover property damage caused by debris from storms and other environmental hazards.

Other risks your boat dock insurance should cover include pollution and other business interruptions. For example, suppose your dock is used for chemical transportation. In that case, it will likely be subject to contamination and other issues that can affect marine life and result in hefty fines for your business. To avoid this, you should look for an insurer that offers pollution coverage as an add-on.

If you’re planning to build a dock on your property, you need to ensure it will meet all your needs. There are a lot of factors to consider, including the size and weight of your boat and other watercraft. The water depth and currents will also impact the design of your dock. If you’re using your dock for recreational purposes, it’s also important to consider the type of activities you’ll be doing.

A skilled dock builder will be able to help you come up with a plan for your dock. They can also answer questions about the design process and provide information on what to expect from the project. They can explain the different types of materials available and their benefits. They will also be able to help you choose the best location for your dock.

The best way to avoid a costly dock construction mistake is to have your design reviewed by a professional. This will ensure that your dock meets all state and local regulations. It’s also a good idea to ask your dock builder about the permitting process and how long it might take to obtain a permit. You’ll also want to know what kind of site work is required before construction begins and who will be responsible for it.

An experienced dock builder will have the skills and knowledge to help you design a functional, safe, attractive boat dock. They will use top-quality materials and follow industry standards to guarantee a quality product. In addition, they can handle any problems that may arise during construction.

If you’re building a dock in a residential area, your builder will have the experience to help you with zoning requirements and other regulations. They will also be able to guide you through the permits and inspections process. The best builder will be able to help you get the most out of your dock and keep it safe for everyone in your family.

Loading docks are complex portals that must be designed properly to function safely and efficiently. Factors influencing this include dock door displacements and adequate staging space within the bay doors. The latter is especially important since a dock with an excessive decline or incline can damage equipment and products. It’s also difficult for employees to maneuver trucks on steep grades and can pose a safety risk.

How Much Do Retaining Wall Installations Cost?

Retaining Wall Installations help correct ground slopes, add curb appeal, and create new usable areas within your landscape. They also help with erosion control and drainage issues.

Be sure to hire a geotechnical engineer if you build a wall over four feet tall. This will save you from costly corrections down the road.

retaining wall

Retaining walls is vital to any property, as it can help prevent erosion and redirect water flow. In addition, they can add value to your home and create new landscaping areas. However, they can also be expensive to install and maintain. To avoid surprises, you should have a clear understanding of how much they cost.

The initial build cost of your retaining wall will depend on the type of materials you choose and any necessary soil preparation. The contractor will dig a trench and backfill it with gravel to prepare the area for the wall. They will then start building. If you want a retaining wall with a specific style, you may need to spend more on the materials. For example, a stone wall costs more than a vinyl one. You can also save money by using less-expensive materials such as railroad ties or concrete blocks.

A retaining wall should be built with proper drainage in mind, as this will extend its lifespan and prevent costly repairs down the road. Your contractor may use drainage pipes, gravel, weep holes, or a criblock design. Regardless of the method, the drainage system will cost you between $80 and $120 per linear foot.

Your retaining wall will need to be reinforced once it reaches a certain height, so you will need to budget for this extra work. This will typically cost about $200 to $400, depending on the size and complexity of the project.

Some retaining walls are very large and require the construction of a foundation, which will increase your overall costs. This is particularly true if the retaining wall is built on a slope and requires regrading.

You should also budget for the delivery of materials. This can be a significant portion of your total cost, especially if the wall is large or uses high-end materials. Depending on where you live, demand for building supplies is high, and delivery times can be long.

In addition to the cost of materials, you will need to consider any labor costs involved in the installation process. This will depend on your region’s labor rates, the complexity of the project, and whether the retaining wall is located in an area that is easy to access or difficult to reach.

When choosing a material for a retaining wall, it’s important to consider the purpose of the wall and your design goals. You also want to keep in mind the budget and the overall appearance of your landscape. There are many different materials you can choose from for a retaining wall, including brick, concrete block, and timber. Each of these has its pros and cons. Wood is the cheapest option, but it can rot and can be vulnerable to termites. Concrete is more durable and can last a lifetime. It can also be decorated with stone veneers or bricks to add visual interest to the structure.

The most common type of retaining wall is a masonry or concrete block wall. These walls can be dry stacked or mortared, and they typically cost $30 to $50 per square foot. They can also be reinforced with steel or concrete. They can be built to any height. However, walls that are over 4 feet tall need to be designed by a structural engineer. This will increase the cost of the project.

In addition to the price of the wall materials, you’ll need to pay for labor. Depending on the complexity of the job, the costs can run from $50 to $75 per hour or $10 to $50 per square foot. You’ll also need to purchase any equipment or materials needed for the project. A permit is also required for most retaining walls, and this can add to the cost.

The first step in building a retaining wall is to build a base for the structure. This can be made of compacted gravel or crushed concrete. You should also backfill each layer of blocks with crushed rock. This will help with drainage and add strength to the wall. Once you’ve completed the first course of blocks, it’s time to start laying the next course. Make sure the blocks are perfectly level and staggered. You should also backfill each row with crushed stone to ensure the stability of the wall.

Once the retaining wall is complete, you’ll need to maintain it regularly. If you neglect to maintain it, it could become unstable and possibly collapse. It’s also a good idea to have an engineer assess the wall every time the use of the area adjacent to it changes. This will ensure that the new loads don’t exceed what the wall was originally designed to support.

While retaining walls may look like simple stacked stones, blocks, or timber, they are in fact carefully engineered systems that wage an ongoing battle with gravity. They restrain tons of saturated soil that would otherwise slump and damage a home or landscape. They also increase usable yard space by terracing sloped land.

Retaining walls can be built of several types of materials, including brick, block, stone, and concrete. Each has its own advantages and disadvantages, but most retaining wall builders agree that the best material for the job is one made of durable, long-lasting concrete. This material can be molded to fit the desired shape and size of the retaining wall, which can give it a unique aesthetic. It is also resistant to corrosion and is easy to work with.

Using concrete for a retaining wall can be more expensive than other materials, but it is worth the investment in terms of durability. To make sure the wall is strong and safe, it must be designed by a professional engineer who will determine how much weight the structure can withstand, the moisture conditions, and drainage provisions.

A retaining wall that is too short or does not have proper drainage can collapse and become hazardous to people and property. In addition, a collapsed retaining wall can contaminate soil and water, which can damage or even destroy crops. This is why it is important to have a retaining wall constructed by a licensed contractor.

Retaining wall construction starts with excavating the site and backfilling the area behind where the retaining wall will be. Then, the builder will add drainage depending on the type of retaining wall being installed. For example, a layered wall will need a drainage system with a perforated drain tile on the backfill.

In most cases, a retaining wall is more than a few feet high and requires a permit from the local building authority. Moreover, a retaining wall should be inspected by a qualified inspector at least once every five years to ensure it is still structurally sound and free of any defects. If the retaining wall needs repairs, they should be completed as soon as possible to avoid further problems.

Retaining walls can serve a variety of purposes in site development. They can be used to hold back soil, prevent erosion, protect structures and roads, and ensure the stability of landscapes. Retaining walls can also be designed for aesthetic purposes, enhancing the appearance of the surrounding landscapes. However, retaining walls require regular maintenance to reduce the risk of failure due to deterioration. This maintenance can include inspections, assessment of risk factors, and implementation of measures to counter these risks.

Insufficient or blocked drainage is one of the most common problems with retaining walls. This problem can result in bulging or overturning, which can threaten the structural integrity of the wall. In addition, water can damage the surrounding landscaping and create a safety hazard. Having a well-thought-out drainage system will help to keep the wall in good condition for years to come.

A retaining wall can be made from a variety of materials, including stones, interlocking concrete blocks, and poured concrete. The choice of material depends on the site and the owner’s preference. While poured concrete is the most durable, it’s not very attractive, especially if the wall will be on public display. Stones and interlocking blocks offer a more natural look while still being strong enough for most applications.

It’s important to choose a contractor with experience in installing retaining walls. They will be able to advise the client on the best type of wall for the situation, and provide advice on the best construction methods. In addition, a professional will have the proper tools and equipment to complete the job safely and efficiently.

While some homeowners prefer to do a project themselves, it’s always better to hire a professional. This will save you time and money, and ensure that the project meets industry standards. Additionally, a professional will know how to work with the local building code to avoid fines. In some cases, it’s even mandatory to have a professional build your retaining wall. This will protect you and your family from potential accidents or injuries. Moreover, the expert will ensure that the retaining wall is built properly and to the right height.

Concrete Lifting: Repairing Sunken Concrete

Concrete Lifting Cincinnati is a popular method for repairing sunken concrete slabs. It’s less invasive and costs significantly less than replacing the damaged concrete.Concrete Lifting

Traditional new concrete pours require several days for them to cure. Mudjacking also involves large machinery that can damage your lawn and garden. Concrete lifting with polyurethane foam is fast, simple, and minimally invasive.

When your driveway, sidewalk, or patio sinks, it can be a big problem. Uneven concrete surfaces are not only unsightly; they can be dangerous for people walking on them or cars driving over them. Fortunately, there are several ways you can repair sunken concrete to bring it back up to level and make it safe for use. One of the most popular methods is called “concrete lifting,” also known as “mudjacking” or “slabjacking.” It involves drilling holes into the sunken concrete and pumping a filler material under it to raise, or “jack,” it back up to its original position.

The best part about this method is that it is much less expensive than replacing the entire slab with new concrete. Replacing concrete involves chipping up the old slab, hauling away the debris, hiring a crew to pour the new slab, and waiting for it to dry, all of which are costly endeavors. Concrete lifting, on the other hand, requires fewer resources and less labor to complete.

Besides being less costly, concrete lifting is also quick and effective. The entire process can be completed in a matter of hours, so you can get back to your normal routine much sooner. Another benefit is that it is less invasive than other concrete repair methods. Mudjacking and other concrete replacement methods involve digging up the old slab, which can ruin your landscaping and cause damage to underground utilities and plumbing systems. Concrete lifting, on the other hand, only requires the drilling of small holes into the concrete, so it won’t affect your landscape or any nearby plants.

Concrete lifting foam is also environmentally friendly and long-lasting. Unlike mud, which contains chemicals that can seep into the ground and poison surrounding vegetation, polyurethane foam is inert and won’t leach into the soil. Additionally, this type of foam is lightweight and won’t contribute to the future sinking of the surrounding soil. This is a great option for those looking to repair their driveways, sidewalks, and patios without disrupting the environment or spending more money than necessary. Contact a concrete repair professional to learn more about how you can use this affordable and effective concrete repair method for your home.

Faster than Replacement

If you have a sunken concrete patio, sidewalk, or driveway that is making it difficult to use your outdoor space, you don’t have to wait for a new slab to be poured. There is a quick and affordable solution, and it’s called concrete lifting. This process uses polyurethane foam to raise and stabilize the sinking concrete slab, and it’s more efficient than mudjacking or slab jacking.

Mudjacking is a common alternative to concrete lifting, but it has several disadvantages that make concrete lifting the better option. Both mudjacking and slabjacking involve digging up your old concrete and pouring in new. This requires large machinery that encroaches on your property, disrupts lawns, and even damages fencing and trees. With concrete lifting, the contractor simply injects stabilizing foam underneath your slab. This foam expands rapidly, filling any void and raising your sunken concrete back to its original position.

The best part is that it takes less than an hour for the foam to set, and you can walk and drive on your concrete surface immediately afterward. This is much faster than the hours needed for new concrete to set, and it’s a lot less disruptive to your daily life.

In addition, mudjacking can create unsightly holes in your slabs and wreak havoc on the surrounding soil. This can cause additional damage and sinking, so it’s important to hire a professional who knows how to handle these repairs properly. Concrete lifting is the better choice if you want to avoid costly and time-consuming complications in the future. It’s also a more cost-effective and environmentally friendly choice than a replacement.

Environmentally-Friendly

Concrete lifting is an environmentally friendly method for repairing sunken and uneven concrete slabs. The process works by injecting polyurethane foam underneath a damaged slab of concrete to raise it back to its original position. This method is a much more environmentally friendly option than concrete replacement, which requires tearing out the existing slab and pouring new concrete in its place. Concrete lifting is also a more cost-effective and quicker alternative to other concrete repair methods.

The polyurethane foam used in concrete lifting is non-toxic and does not leach into the soil like mudjacking slurry does. This is important because it means that your driveway, sidewalk, or patio won’t be covered in toxic mud after the repair. The injection of foam is also quick and easy. Unlike concrete replacement, which can take days or even weeks to complete, concrete lifting is completed in just a few hours. This minimal disruption makes it perfect for properties with decorative landscape features or structures that may be damaged by excavation.

Unlike concrete replacement, which uses a cement-based mixture, concrete lifting utilizes a lightweight and durable polyurethane foam. The polyurethane foam expands as it is injected beneath the concrete, filling up any voids and raising the slab back to its original position. This method is also known as slab jacking, poly-leveling, and polyfoam injection.

To begin the concrete lifting process, a technician will drill dime-sized holes in the affected concrete slab. Geolift, a lightweight and environmentally friendly polyurethane foam, is then injected into the holes. This environmentally friendly concrete lifting solution is made from raw materials, including recycled plastics and renewable soybeans, and contains zero ODP blowing agents.

Once the foam has been injected, it will harden within minutes, allowing you to use your concrete surface again in no time. This is a major advantage over concrete replacement, which can take days or even several weeks to complete. The foam also weighs less than mudjacking slurry, so it won’t add any additional stress to the already unstable soil beneath the slab.

Driveway Repair: Why It’s Important to Repair Your Driveway

A well-maintained driveway improves your property’s curb appeal and can increase its value. Driveway Repair Charleston SC can address concrete issues such as cracks, discoloration, grease stains, and sunken areas.Driveway Repair

Cracks less than a quarter-inch wide do not pose a structural threat and can be filled or patched with a sealer. However, this is only a band-aid that defers the need for a more extensive repair or replacement.

It’s a beautiful sunny day; the birds are chirping; you’re brewing your morning coffee; and then you walk down to your driveway to grab the newspaper. That’s when you notice that there are a few cracks forming in your driveway, and they need to be fixed right away. Cracks are one of the first signs of a problem with your concrete driveway. They can lead to potholes, which are dangerous for your car and can cause major damage over time. Cracks can also cause water to leak into the foundation of your home, causing further problems.

The good news is that there are many things you can do to fix your driveway cracks and prevent them from getting worse. The first step is to clean the cracks thoroughly. This can be done using a pressure washer with a nozzle that has strong degreasing agents or one that is specially designed to remove mildew and mold. After cleaning, wet down the surface to prevent the cleaner from drying too quickly.

Once the cracks are cleaned, they can be filled with a cold-process asphalt repair compound such as blacktop. This can be purchased at your local hardware store and mixed with water to form a thick paste that can be worked into the cracks. When filling the cracks, you should use a pointing trowel to push the compound into the crack and completely fill or “stuff” it. This will give the patch a flexible feel that allows it to expand and contract as the temperature changes without pulling away from the existing concrete.

Cracks can also develop due to faulty installation. If the base and foundation of your concrete aren’t packed tightly enough or if they use sand or soil substrates that shift and erode over time, this can lead to cracking on the surface. Excessive weight on the driveway can also cause cracks, especially if the load is uneven. The improper spacing of control joints can also lead to concrete cracking.

Finally, the earth underneath your driveway is always shifting, and this can cause your asphalt to crack as it settles. This is often the result of poor foundation installation.

Potholes

Potholes are deep depressions in your driveway’s surface that can range in size from a few inches to several feet across. These damaged areas are caused by water damage underground combined with the pounding of heavy vehicles on the asphalt above. If left untreated, these holes will get bigger and can cause serious damage to your vehicle’s suspension. To avoid serious problems, you should fill in any potholes in your driveway as soon as they form.

To properly repair a pothole, you’ll need to start by removing any loose debris or large rocks that are in it. Then dig down a bit and create firm edges around the hole with a shovel. This will help the filler material compact well and prevent the pothole from forming again in the future. Next, fill the pothole with coarse gravel about three to four inches below the surface of your driveway. Then, tamp the gravel down with a steel tamper or 4×4 wooden post.

Whether you have a gravel or asphalt driveway, you can repair these damaging areas by following this simple procedure. If you’re unsure about your ability to do this, it is best to hire a professional, as it requires the use of tools and heavy equipment.

It’s important to note that swerving around a pothole will only make it worse. If you hit it at the wrong angle, your car will bounce all over the place and could end up damaging the suspension. In addition, this can cause you to lose control of your vehicle, putting yourself in danger.

If your driveway has a lot of potholes, you can repair them quickly and effectively with cold-lay tarmac from a reputable company. To avoid this, you should apply the tarmac during dry weather and not in wet conditions. In wet weather, the tarmac will often puddle and become muddy, which can leave an unsightly appearance or even lead to structural damage in your driveway.

If you’re planning to use cold-lay tarmac to fill a pothole, be sure to choose Instant Road Repair Red for your job. This type of tarmac comes in a red color to match your existing tarmacadam, as opposed to the black that’s available with other cold-lay tarmac products. You’ll also need a can of cold joint spray and bonding tape to seal the repaired area and prevent water ingress.

Sunken Areas

If a sunken area in your driveway becomes a safety hazard, it’s important to fix it as soon as possible. If left unattended, it can result in a loss of control and traction for drivers. It can also damage the undercarriage of vehicles, including their engines and exhaust systems. It is also an invitation to moisture, which can lead to rotting and other structural problems for your driveway.

A sunken driveway can be caused by poor drainage, erosion, or shifting soil. It can also be the result of a construction error or a problem with the foundations or groundwork. If you’re a new homeowner, check with the builder, as it may be covered under your warranty.

If you want to tackle a sunken repair yourself, a concrete patching kit is one option for small areas of your driveway. Before attempting this, be sure to remove any loose debris that is causing the low spot. Then, sweep the area and vacuum away any dirt or gravel that may be causing it to sink further. This will help ensure that the patch you are using sticks well to your surface.

A more extensive repair for a sunken driveway involves relaying the paving or asphalt, whichever was originally used on your home’s driveway. This is typically the most expensive solution for any kind of driveway repair, but it can be necessary if there is a serious issue with your base level that causes sections to shift or sink over time.

For this method, a contractor will assess the condition of your existing driveway and the underlying cause of its sunken spots. Once they know what the best course of action is, they will drill holes into the sunken section and then inject high-density polyurethane foam. This process is called “polyurethane foam concrete lifting” or “foam jacking.”

This will fill the voids under the sinking part of your driveway, allowing it to return to its original position. Before doing this, it is a good idea to check and clean the downspouts on your property to make sure that they are draining correctly and keeping water away from your foundation and your driveway.

Damage to the Foundation

If your driveway cracks and sinking areas are not treated promptly, they can spread to the foundation and compromise its stability. This can cause a variety of problems, including bowing walls, leaning chimneys, and basement flooding.

While cracks and other signs of a failing foundation are obvious indicators, some damage is not as obvious or easy to recognize. For example, doors that stick are often thought to be a sign of a foundation problem but are actually a result of the door hinges. When combined with other warning signs, though, a sticking door is a clear indicator that the foundation is in trouble.

Another less obvious sign of a failing foundation is the presence of water around your property perimeter. This may also be accompanied by standing water on the surface of your driveway and sidewalk. This can be a serious issue because it is indicative of a lack of proper drainage solutions around the home. Perimeter saturation is directly related to numerous problems throughout the home, including unlevel steps, uneven driveways, and foundation damage.

If you see your concrete driveway starting to heave or crack, it is a good idea to hire a professional to come out and take a look at the damage. These specialists can help you find a solution that will address the root cause of the damage rather than just patching the symptoms.

For small cracks on a concrete driveway, you can use a crack filler designed for this purpose. These products are available in no-mess cartridges for a caulking gun and pourable bottles that can be filled into the crack. Once the crack filler is cured, you can remove the excess with a putty knife.

For jagged cracks more than an inch wide, you may need to purchase a concrete repair kit that includes a float, wood pieces, a concrete finishing brush, and a rub brick. In addition to the concrete repair product, these kits include bonding primer and concrete fortifier as well. These products should be used only on exterior concrete and must be cleaned thoroughly to ensure a successful application.

Stamped Concrete Looks and Feels Like Natural Materials

When you think of concrete, you probably don’t envision it as something colorful. However, Stamped Concrete Colorado Springs can be made to look like stone, brick, cobblestone, slate, and even worn wood planks.Stamped Concrete

This technique involves imprinting wet concrete with rubber stamps or texturizing mats that are molded from the real material you want the concrete to mimic. These mats are typically sprayed with a color-release agent before they’re placed on the cement.

Stamped concrete is versatile and can be made to resemble a variety of natural-looking materials such as tile, slate, cobblestone, flagstone, and wood. This gives you a vast array of design options for your patio, walkways, or driveway. It’s also less expensive than pavers or other paving materials.

Another benefit of stamped concrete is that it’s easier to maintain than many other surfacing materials. For example, if you have a paved surface, weeds can easily grow between the cracks. However, with a stamped concrete surface, weeds won’t stand a chance. This is because a stamped concrete surface has been sealed, protecting it from the growth of weeds and other unwanted vegetation.

To keep your stamped concrete looking its best, sweep it regularly and hose it down occasionally. This will prevent the buildup of dirt and grime, which can cause permanent stains. You can also use a pressure washer on the surface, but make sure you’re using a gentle setting and sweeping motions to avoid damaging the surface.

If your concrete is starting to show signs of aging, you can apply a color-retaining sealer to the surface to refresh its look. This will help protect the surface from UV rays and other environmental factors that can fade or discolor your concrete. It is important to note that a color-retaining spray or sealer is not the same as a waterproofing sealant, and you should only use a waterproofing sealant on uncolored concrete.

Lastly, you should never use deicing agents on your stamped concrete. These chemicals are often too harsh for concrete and can eat away at the surface, leaving it damaged and unattractive. Instead, opt for a non-toxic ice melt that is safe for use on concrete.

A well-maintained stamped concrete patio, walkway, or driveway can add up to 15 percent in value to your home. It’s an excellent return on investment, and it will also impress potential buyers if you ever decide to sell your property. So if you’re looking for an affordable way to improve the curb appeal of your home, consider investing in a new stamped concrete surface.

It’s Durable

In the past, homeowners complained that stamped concrete wasn’t as durable as standard concrete. However, new stamps and better methods of installation have addressed this issue. The surface of a well-maintained stamped patio or driveway will last for many years before it shows any signs of wear and tear. This is still a far longer lifespan than most other types of outdoor flooring, including grass and pavers.

Like all other forms of paving, stamped concrete can crack over time. This is especially true if you live in an area with harsh climate changes. This constant heaving and expansion of the ground can cause concrete to crack, but it is less likely than cracking in brick or other paving materials.

However, this is a minor concern compared to the benefits of having stamped concrete. It’s important to have your stamped concrete regularly cleaned and resealed in order to keep it looking its best. Resealing will help to prevent water damage, stains, and other issues that could affect the beauty of your patio or driveway.

While stamped concrete is easy to maintain, it is not a DIY project. Pouring and stamping concrete requires a lot of equipment, knowledge, and expertise. If you’re not comfortable with this process, it’s best to hire a professional to install your stamped concrete. Attempting to do this on your own can lead to an uneven and unattractive surface. It’s also a good idea to get a contractor with experience installing stamped concrete, so you can rest assured that your investment is in good hands.

Stamped concrete is highly customizable, so you can choose patterns and colors that match your home or blend in with other concrete elements, such as pavers or tile. It can also be used to create permeable pavements that allow rainwater to pass through them and avoid flooding or pooling after a rainfall.

The most important thing to remember about maintaining your stamped concrete is to keep it clear of debris and unnecessary chemicals. It’s especially important to keep de-icing salts off of your stamped concrete because this corrosive chemical can damage and stain the surface. If you have to use rock salt, try to sweep it off of your stamped concrete surfaces as often as possible. It’s also a good idea not to let leaves or other debris pile up on your patio or driveway, as this can trap moisture and cause stains. If you’re using fertilizer, such as Miracle Grow, for your plants, be sure to keep it away from your stamped concrete, as this can also destroy the sealer.

It’s Affordable

Stamped concrete can be less expensive than other hardscape materials, such as paving stones, making it an excellent option for homeowners on a budget. It also doesn’t require the time-consuming and labor-intensive process of digging and laying individual pavers, allowing it to be poured quickly. This is especially true for large areas like a driveway, patio, or pool deck.

One of the best things about stamped concrete is that it’s very customizable, allowing you to choose from a variety of colors and textures to match your aesthetic. It’s also easy to add decorative elements, like a monogram or logo, to create an even more personalized look.

Another benefit of stamped concrete is that it’s much easier to maintain than other materials like paving stones. Regular sweeping and cleaning with a hose and pressure washer will keep it free of dirt, dust, and debris that could stain or damage the surface. You should also avoid using deicing agents on your concrete, as these chemicals can eat away at the surface and make it more likely to crack or chip.

However, if your stamped concrete does get damaged, it’s not as simple to repair as with pavers or slabs. This is because the stamped concrete will have to be either patched or removed and replaced, which can be difficult if the original color has faded. In contrast, replacing a single block of pavers or slabs is usually as simple as removing the old one and placing a new one in its place.

When it comes to repairing or replacing a section of your stamped concrete, you’ll want to hire a contractor who specializes in this type of work. They’ll have the tools and experience needed to ensure the repaired or replaced area matches the rest of your concrete.

In addition, stamped concrete can be damaged by freeze-thaw cycles, which can cause the ground beneath it to shift and crack. Pavers and slabs, on the other hand, have regular seams between each block that will help them withstand these forces better.

It’s easy to maintain.

If you want your home’s exterior to look like a stone, brick, or cobblestone patio, walkway, or driveway, consider stamped concrete. It provides a high-end appearance that lasts longer and costs less than natural materials. It’s also easy to maintain if you follow some simple advice.

The first step in installing a stamped concrete surface is to prepare the slab. This includes washing the concrete to remove any dirt or debris and letting it dry. Once the concrete has dried, it’s ready for the stamping process. For best results, contractors use a color-releasing agent prior to stamping. This helps prevent the stamps from sticking to the concrete once it dries and allows for more precise placement of the stamps.

After the concrete is stamped, a sealer should be applied to help preserve the color and shine of the concrete. The sealer will also help protect the concrete from water and other harsh chemicals that can damage it over time. When choosing a sealer, ask your contractor for recommendations that will be safe for stamped concrete and other surfaces on your property.

Cleaning your stamped concrete should be done regularly with a broom, sweeper, or power washer set to a low pressure setting. If the concrete gets stained, try using an alkaline degreaser that’s safe for outdoor concrete to break down grease and oil. For other types of stains, mix a non-abrasive, mild cleanser with your water to mop the concrete.

In the winter, be careful when using de-icing salts on your stamped concrete. These corrosive chemicals can cause surface damage, particularly if they are used during the first winter after your concrete is installed. If possible, park away from the edge of your driveway to avoid cars tracking salt onto the concrete.

Although the concrete may take a few weeks to install, once the work is complete, it will be a lasting and attractive addition to your home. The key is to choose a good contractor who understands the ins and outs of installing stamped concrete properly, so you can enjoy the benefits of your new patio, walkway, or driveway for years to come.