Author: Tamara Perry

How to Spot Roof Damage

Severe storms and high winds are your roof’s worst enemy. High winds can damage shingles and other roofing materials, dislodging them and causing them to lift. Look for signs of wind damage such as cracked housings on plastic roof vents or broken seams on metal ones. Also watch out for water stains on ceilings and walls, as these indicate your roof is damaged.

Damaged Shingles

If you notice your neighbors are on the roof repairing or replacing shingles, it’s a good idea to check out your roof for damage. The difference between regular wear and tear and serious damage will likely be apparent in dark spots or uneven shingle coverage on your roof. A home inspector from Roofing Company Colorado Springs can tell you if these signs indicate a necessary repair or replacement.

roof damage

In addition to general wear and tear, a major problem with your roof may be caused by wind or hail damage to the shingle’s surface or flashing. In this case, it’s best to contact a roofing specialist who can determine whether you have a valid insurance claim and the extent of the damage.

Some types of shingle damage include creased or flipped shingles, where the shingle tab is lifted up and over an adjoining shingle, or it is folded down and a crease or flap is created; blistering, where small pockets of air are formed in the shingle’s asphalt coating and can be felt as bumps under the shingle when you walk on the roof; and cracking of the shingle surface due to age, sun exposure and other environmental factors.

Another common type of shingle damage is loss of the granules, which protect the asphalt shingle’s surface and add fire resistance. While it is normal to lose a few granules over time, if the number of granules in your gutters or yard increases, you probably have roof damage and should have the area checked by a professional.

Replacing a single damaged shingle is not difficult, but it’s definitely a job for a professional. You’ll need a hammer, a flat pry bar and a handful of 11/4-in. roofing nails. To remove a nail, start at the bottom edge of the shingle and slide the pry bar under the shingle directly above it, then pry upward until the nail pops up about 1/4 in. Pull out the nail and then gently lift the shingle to free it from its sealer strip. After the damaged shingle is removed, nail a new one into place starting at the bottom edge of the roof and moving up in a pyramid pattern.

Fascia Damage

The fascia board is a critical part of the roof eave and gutter system. It helps to keep water from damaging the roof shingles and allows air to circulate. In addition, the fascia holds up the soffit which is installed under overhanging roofs. It’s important to check the condition of the fascia and soffit on a regular basis. If the boards become rotten everything that is attached to them will be at risk of falling off your home.

The best way to identify a rotten fascia is by looking for discoloration in the wood. When this happens the paint that was protecting the fascia has worn away, leaving the wood exposed. It’s also a good idea to inspect the eaves of your home for areas where the wood seems soft and crumbly. It may even appear that the gutters are sagging. This is a sure sign that the fascia has rotted.

If you notice a section of the fascia has rotted it’s best to replace it. It’s important to do this before the rot gets worse. If you choose to replace the fascia yourself, it’s a good idea to remove the old board and examine the framing materials that are underneath it. If the underlying material is badly rotted, it will need to be replaced too.

Moisture damage is a common cause of rotting fascia. A roof leak, a gutter clog or other roofing problems may leave the fascia exposed to moisture on a consistent basis. This will eventually lead to wood rot that could affect the stability of the gutters and the roof overhang.

Mold, fungus and black stains on the fascia are also signs of moisture damage. These growths can spread quickly from one area to another, causing the whole fascia to be ruined.

The best way to prevent this type of damage is to ensure that the fascia and soffit are properly caulked and painted. This will help to protect them from moisture damage and make it easier to spot if there are any problem areas. It’s also important to keep animals and insects away from the soffit and fascia as much as possible.

Water Leaks

A roof should protect the inside of a home from rain and other precipitation. If it isn’t doing that, water can seep through and damage other structures in the home such as drywall and insulation. This can also create rot and mold.

If you suspect that your roof is leaking, look in places you can’t normally reach to find the source of the problem. For example, if you spot water spots on the ceiling, check to see if they’re directly above a shingle or flashing leak. Leaks are often caused by pinholes or other small failures in caulking and other exterior materials, so locating the leak may take a bit of detective work.

Another sign of a water leak is if you notice stains on the ceiling or walls. Water leaks can leave dark stains that are usually brown or yellow in color. The darker the stain, the more severe the leak.

Look for water stains on the ceiling, drywall and flooring around the area of a leak. This may indicate that the leak has been there for a long time and that it has rotted or caused other structural problems in your home. You can also check for rust on metal flashing, as well as dents and warped material.

If you do spot a leaking area, it’s important to call in a professional as soon as possible. This will help ensure that the damage is properly repaired before it can become worse, and it may even be covered by insurance. Depending on your homeowners policy, the insurance company may send an adjustor to inspect the damage and give you an estimate.

It’s also a good idea to keep track of the repair process and who you’ve spoken to at the insurance company. This can help avoid misunderstandings and frustration, and it will give you a better understanding of the status of your claim. In many cases, if the damage is severe enough, a tarp may be put up while your roof is being fixed to prevent further damage. Keeping records can also help you avoid being overcharged by contractors or the insurance company.

Mold

If water from a roof leak accumulates in the attic, it can lead to mold growth and mildew. This is not a problem you want in your home, as these fungi wear away at the wood and drywall, and can also cause health issues for family members. The spores produced by these fungi can trigger allergy symptoms, breathing problems and other serious health conditions.

Mold and mildew need moisture to thrive, and the humidity provided by some roof leaks can make conditions ideal for these fungi. Once they have taken hold, these spores can spread through the ventilation system in your home and contaminate the air you breathe. This can cause allergies, respiratory issues and other health problems for everyone in your home.

One of the quickest ways to identify mold is by its rancid smell. If you notice this odor, it is a clear sign that the mold is from a roof leak and should be removed as soon as possible. Another way to spot a mold problem is by looking for discoloration or dark spots on the ceiling. These spots indicate that the affected area is saturated with water from a roof leak.

Once the conditions are right, mold spores can begin to grow within a few days. Once the spores are established, they will continue to grow until the area is cleaned and the underlying problem is fixed. Mold growth caused by a roof leak is often confined to the attic, drywall and insulation in the affected area, but if it goes untreated, the mold can spread throughout your home.

If the mold is limited to a small area, it may be easy for you to remove on your own. This involves finding and fixing the source of the leak, spraying the affected area with a fungicide and scraping it off. Once the area is completely dry, it will need to be monitored over the next few weeks to ensure that the mold does not return.

However, if the mold growth is extensive and requires professional removal, it is best to consult a specialist. A professional will be able to find and fix the source of the leak, as well as spray a fungicide to kill any existing spores and clean the affected areas.

Basic Equipment for the Handyman

Handyman Naperville IL is skilled in various general repair and maintenance projects. They often offer lower rates than trade-specific professionals like plumbers or electricians.

HandymanHandymen may work independently or for repair service companies, home warranty companies, or property management companies. They can also be full-time employees. Regardless of their employer, handymen must have certain tools to succeed.

A circular saw is a versatile power tool that many homeowners and handymen use. It cuts wood, metals, plastics, fiberglass, cement block, and slate. Its flexibility makes it an alternative to a miter or table saw in many situations. It can also be a convenient way to cut pipes or other materials with a smooth, straight edge. Several types of circular saws are available, including corded and cordless designs, and it’s important to choose the right one based on your needs.

While a circular saw is a powerful tool that can do a lot of work, it’s also very dangerous to use. Always wear proper eye and hearing protection when operating a power tool, and never allow anyone else to handle it. Also, make sure to follow all safety guidelines for the particular type of saw you’re using.

To keep your circular saw working properly, it’s important to regularly check the blade and guards for damage or wear. If you notice that your blade isn’t cutting smoothly or the edges are worn down, it may be time to replace it. It’s also a good idea to regularly clean your tool and remove sawdust.

To get a cleaner cut, always support the material you’re cutting on two strong sawhorses or bench supports that are overhanging enough to allow the off-cut piece to fall off of them. It’s important to avoid propping up this off-cut piece as it can cause kickback and splintering. Also, if you’re cutting something that will show both sides, put it down on the good side and score the top with a utility knife before you cut. Using this trick can help reduce splinters and create a better-looking finished product.

Cordless Driver

A cordless driver provides a handyman with a drill-like tool that operates using battery power. It can be used for a wide range of projects, including installing drapery brackets, drilling holes for drywall anchors, and driving screws. This type of driver also offers the flexibility to attach other accessories for specialized tasks like rotary scrubbing brushes for heavy-duty cleaning, stirrers for paint, and abrasive discs for auto repair. The most important thing about a cordless impact driver is its torque (twisting force) which is far higher than that of a regular drill or screwdriver. This allows it to drive large screws into lumber with ease.

Chalk Line

A chalk line, also known as a chalk reel or chalk box, is a hand tool that stores a coil of string coated in powdered chalk. The end of the coil is tied to a hook, and it can be used to impart straight lines on surfaces. When you need to measure up from the floor or down from the ceiling, a chalk line helps you do so with greater precision and accuracy than a tape measure.

You can find a variety of chalk lines in different sizes, colors and capacities. The material the line is made of influences its performance, and a thick cord generally performs better than a thin one. The casing can also make a difference; aluminum, stainless steel, and heavy-duty plastic are among the strongest options available. The end hook is another crucial component of a chalk line, as it must be able to fasten onto various objects and ledges. Look for a wide-end clasp that can be used with gloves and provides plenty of tension when snapping the chalk line.

Once the chalk line is ready to use, you need to identify two endpoints on a surface and tie the chalk line to one of them. Then, you can stretch the line taut over the other endpoint and snap it. The resulting mark should be clearly visible and will stand for a while, so you can continue your work without having to worry about it washing away or becoming obscured by other materials.

For a permanent line, consider red or yellow chalk. These high-visibility colors contrast well with a range of different materials and will not wash away easily in wet environments.

Claw Hammer

The claw hammer is the main tool in any handyman’s arsenal, and there are a lot of variations on this simple hand tool. They range from the basic household hammer to the large demolition-oriented rip hammers. These tools can perform a number of tasks, from pounding nails to prying boards apart in demolition work.

The basic hammer is a moderate-sized cylinder with a striking surface on one side and a curved claw on the other. Its handle can be made from steel, wood such as hickory or ash or fiberglass, and is usually covered with rubber for comfort. A handyman should know how to use the hammer properly, as an incorrect stance can lead to wrist injury and mis-hits.

Most hammers have a smooth face for driving nails into wood and a textured or milled face to grip fasteners. There are also special hammers called “dead blow hammers” that can reduce damage to surfaces where there is a high risk of damaging wood or metal.

There are a variety of claw hammers that have curved, pointed or straight claws. Straight claws are best for pulling small nails and brads, while curved claws are better for demolition or removing loose nails in wood. There are also hammers with a single nail claw that is perfect for ripping nails out in tight spaces.

Hammers come in a variety of head and neck designs, but they all have one thing in common: they must be strong enough to withstand repeated strikes against the wooden surface. The best hammers are drop-forged and heat treated for strength, and they are available in a wide range of sizes. Choosing the right size depends on the types of tasks the hammer will be used for, and there are a few other factors that a handyman should keep in mind as well.

Tape Measure

Whether it’s used to find the length of a window blind or to make a mark on a door frame, the tape measure is one of the most indispensable tools for any handyman. However, did you know that your trusty tape measure has a few tricks up its sleeve? To celebrate National Tape Measure Day (July 14), we’ve put together a list of 7 surprisingly awesome features hidden on your everyday tape measure.

The housing (also known as the case) holds the coiled tape and is made of plastic or metal. At the end of the housing is a small hook that’s sometimes called a tab, tang, latch or lip and serves several purposes. The hook can be hooked onto a nail or screw to hold the tape in place, it can help you grip something solid for marking or scribing, and it’s also used to pull the tape out of the case and recoil it back into its housing.

When measuring a surface, make sure to keep the hook against the edge of the object you’re using it on and press the housing firmly against the wall or other surface. This helps ensure an accurate measurement and prevents the tape from bending. Bending the tape can give you a false reading, and it also damages the tape over time.

Most tape measures display both imperial and metric measurements, with inches being on the top and centimeters on the bottom. To read a metric tape, count the white arrows (also called increments) on the blade. Each inch has sixteen white arrows, which are the shortest lines on the tape measure. The white arrows indicate that there are four equal parts or sixteenths in an inch.

Hardwood Floor Repair – How to Repair Scratches and Gouges

Hardwood floors take a beating over time. Scratches from furniture moving, hyper pets, and everyday wear and tear are inevitable. When wood gouges appear, use a filler such as finish putty that matches the floor gloss to conceal them. Using wood filler rather than stain is preferred since it blends in with the grain and doesn’t look like a blob.

FlooringConsider replacing the damaged planks or refinishing the entire room for severe gouges or those in the corners of rooms. For the most stubborn stains and scratches, it is recommended that you consult with a professional. This way, you can be certain that the issue will be dealt with in a way that will prevent future problems and keep your hardwood flooring in excellent condition for years to come. In the meantime, always cover the floor with a rug or use floor mats to help prevent damage. This will also help to keep dirt and debris from tracking into your home. Ultimately, the best way to prevent dents and gouges in your hardwood floor is by placing floor mats under heavy furniture.

Hardwood floors add an elegant touch to any home. But over time, scratches and gouges can mar the beauty of this natural material. Fortunately, there are some simple ways you can repair your hardwood and keep it looking great. The key to restoring the look of your hardwood is to sand down the boards and apply a new finish. Refinishing is a more permanent option than simply resurfacing the wood, so it may be better if your floors show warping or water damage. Typically, refinishing will take longer than resurfacing, and it is more expensive.

Before refinishing, you should clear the room of all furniture and any other objects that may get in the way while the sanding process takes place. You should also hang on to any extra planks if you need to fill a hole or a gouge. Depending on the state of your floorboards, you should sand the entire surface to remove any old finish and bring up the bare wood. You should begin with a medium-grit sandpaper and move up to finer grades until the surface is smooth. After sanding, you should vacuum and wipe the floor with a tack cloth to eliminate any dust particles.

When the sanding is complete, you can then apply a polyurethane finish. You can choose from water- or oil-based finishes, though following the manufacturer’s instructions for proper application is important. Once the finish is applied, the floor must cure overnight before you can return to the room.

Refinishing can be messy, so it’s best to do it when the weather is warm and dry. This will make the process safer and ensure that your home is free from any moisture or chemical residues that could interfere with the quality of the finish.

If you’re uncomfortable tackling this project yourself, hiring a professional flooring company like Gordon James is a good idea. They’ll be able to use dust-free sanding equipment and Bona stains, sealers and finishes for less mess and faster results. They can also repair damaged areas with wood putty, and replace any boards that are too far gone.

Scratches are a common and frustrating problem on hardwood floors. Fortunately, scratches that don’t penetrate the wood can often be repaired by re-applying the protective coating that keeps your floors shiny and new. Before proceeding with any scratch repair, clean the entire area with a microfiber cloth and specific floor cleaner until it is dirt-free. Once that is done, wipe the scratch and surrounding areas with another clean, soft cloth until they are also dry.

You can use a marker or blending pencil to camouflage the mark for scratches that have damaged the top finish but not the wood underneath. A little steel wool rubbed over the scratch can also help, but always rub with the grain and not against it to prevent further damage. If the marks are really deep, a bit of wood filler may be needed to hide them. This can be purchased at your local hardware store and typically comes pre-colored to match your flooring. Use a plastic putty knife to apply the filler, making it less likely to scratch your flooring further. Once the filler dries, it can be sanded down and stained to match your floor’s color.

If you have old hardwood floors beginning to separate, try using a color-matched wood filler to fill the gap. If you cannot find or purchase the right filler color, sand down the old wood and add a fresh coat of polyurethane, varnish, or sealer. Be sure to use a lambs-wool applicator or brush to avoid air bubbles in the new coating and let it dry completely before traffic can be used on the area. Family Handyman reports that you can also rip a narrow band of wood from the side of your planks and glue it into the gap.

To minimize scratches, the place felt pads on the legs of any moveable furniture and use soft-tipped protectors on your furniture’s bottoms if it’s not attached to the frame. You can also protect your floors from further scratches by encouraging guests to remove shoes in the entryway and by regularly removing heavy items from the home. By taking these measures and following these simple tips for preventing floor damage, you can extend the life of your hardwood floors and avoid the hassle and expense of hiring a professional to refinish them.

Even with the best floor care, there is a good chance that your hardwood floors will develop gouges or dents at some point. This is especially true if you have kids or pets, or if you move large pieces of furniture often. In addition to lowering the overall beauty of the room, dents and gouges can cause the floor to squeak and can even affect its structural integrity.

Fortunately, there are several options for fixing these issues. Surface-level scratches and dents that haven’t pierced the wood can usually be removed using an orbital or power sander with a fine steel wool pad. Alternatively, you can also try rubbing the scratched area with a stain or color match. Be sure to test the color of your stain in an inconspicuous spot before applying it to the floor.

For deep dents and scratches in the surface of your wood flooring, you will need to use an oil-based wood filler. This can be purchased at a local hardware store or home improvement center and is available in several different colors. Be sure to choose a color that is similar to your floors and that will blend in with the rest of the surface. When you have applied the wood putty, sand it until it is flush and smooth with the surrounding area and then apply a finish.

Hardwood floors are beautiful and add warmth and character to your home. But over time, they can become worn and damaged. Refinishing or resurfacing your hardwood floors is an excellent way to breathe new life into them. However, it is important to understand that refinishing or resurfacing your hardwood floors may not be enough to fix deep scratches, dents, gouges, or other damage. In these cases, it is probably best to replace your hardwood floors completely.

When refinishing your hardwood floors, you will need to use a large drum sander to sand down the boards and remove the existing finish. This is an extensive and labor-intensive process that will require a lot of work on your part. You will also need to stain and seal the wood after sanding. This is an ideal option for homeowners who are looking to refresh their flooring and add a bit of modern style to their home.

You should only try to refinish your hardwood floors if they are made from solid planks of wood or if you can refinish them yourself using an at-home refinishing kit. You can also refinish engineered hardwood floors, but you must make sure that the layer of real wood bonded to the plywood is thick enough to be sanded down without touching it.

If you have wood floors with a glossy surface, you should use a revitalizer gloss regularly to keep them shiny and protected. This product is available at most home improvement stores and will not only restore shine but fill in shallow scratches, dings, and dents.

In high-traffic areas, the finish and stain on your hardwood floors can wear away, leaving the bare wood exposed. You can resurface your wood floors by sanding them down to the bare wood and then applying a coat of polyurethane.

There are several types of polyurethane finishes, including gloss, semi-gloss, and matte. The type of finish you choose should depend on the amount of foot traffic in your home and what color and design elements you are aiming for. For example, you should choose a semi-gloss or matte finish if you have children and pets who can easily scratch the wood.

Air Conditioning Replacement – What to Look For

If you want an air conditioning replacement in your home, you should know the process and what to expect. This will ensure that you can have the best experience possible when dealing with a company with a good reputation.

HVAC Services
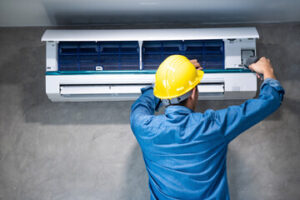
Some of the most popular choices for air conditioning replacement include R-22, R-32, and R-410A. These are all ozone-friendly refrigerants that don’t contribute to global warming. You’ll need to research and talk with a professional Air Conditioner Repair North Kansas City before choosing the right refrigerant for your AC. If you have an air conditioner or heat pump, you know that refrigerant is a vital part of the system. Air conditioning helps you stay cool in the hot summer months and allows you to keep food fresh for longer periods.

When it comes to your AC, you’ll want to make sure that you choose the correct type of refrigerant. While there are many different options, you may need to figure out what to look for. You’ll also need to consider the age of your unit. Adding the wrong type of refrigerant to your unit can be a safety hazard.

A good contractor can help you determine whether you should replace your AC or keep it running for a little longer. An aging unit might be causing strange noises or is not keeping your home cool enough. If you are considering redecorating, you may need to dispose of your old unit and opt for something more energy efficient. You need three things to find out how old your unit is. First, you need to know its serial number. Then, you need to know its name. You might need to search online or ask your contractor.

The first digits of the number represent the week that the unit was manufactured, while the second digits of the number represent the month. As a rule of thumb, older units will be more complicated and cost you more money to fix.

A newer, more efficient air conditioning unit can save a significant amount of money on your utility bills. In addition, it will also boost the ambiance of your home while improving your indoor air quality. It may be time to take the leap and replace your old, inefficient unit. Fortunately, most AC manufacturers are more than happy to provide replacement options. So, what should you look for when selecting a new unit?

The first rule of thumb is to avoid buying a used unit unless you plan to replace it in the near future. This is the best way to ensure that you will be able to enjoy your new air conditioning unit for many years to come. If you are unsure of where to start, take advantage of the numerous AC rebate programs offered by most manufacturers.

If you’ve noticed a few hot spots in your home, or if your air conditioner is making strange sounds, it could be time to replace your ducts. Air ducts are designed to perform for an average of 10 years. However, they can suffer problems with age, which can lead to inefficient operation.

Ducts can become clogged with dust and debris. This can lead to holes and leaks. If a hole or leak is not fixed, it can become a perfect place for pests to enter your home. The pests can then spread bacteria and leave foul odors. Dirty air can wreak havoc on family allergies. It can also cause a number of health issues, such as asthma, respiratory illnesses, and mold. Having dirty air circulating in your home can increase your energy bills.

Preparing for an air conditioning replacement. If you are in the market for a new AC unit, you might have some questions about the process. Not only will you have to make some adjustments to your house, but you’ll also have to deal with the installation crew. Fortunately, there are several steps you can take to make the process a little less stressful.

First, you’ll want to prepare the area where the new unit will be installed. This involves clearing the path to the furniture and other fixtures in the room. Also, you’ll need to ensure that the air conditioning system has enough room to operate comfortably. Lastly, you’ll need to consider how much power your old unit was using. By relocating the electrical outlets, you’ll be able to ensure that your new unit has the proper voltage.

What Is Residential Junk Removal?

Residential Junk Removal is a service company provide that removes junk from homes. Many people can do the work themselves, but it’s also possible to hire a company to do the work for you. Junk removal services can be cost-effective and save you time and hassle by removing junk from your home. Visit Site to learn more about residential junk removal.

Junk Removal Services
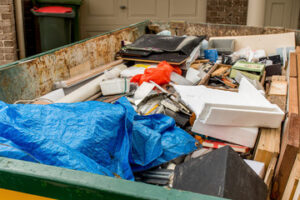
The price of residential junk removal will depend on several factors. The type of materials contained in a pile will determine how much the service will cost. It may include defunct appliances, old furniture, or a hefty stack of shipping boxes. There are a variety of different types of junk removal services available.

The City licensing board regulates junk removal companies. They must have a business license and have the proper equipment to move things. They also must have a set pricing scale. The price may range from $40 for a small junk removal session to several thousand for a large construction site. It is important to consider the type of service you need and know the cost beforehand.

A junk removal company will come to your home and haul away junk of all types. The process is similar to hiring movers for moving, but junk haulers will take away items permanently. They can come to your home on demand or schedule an appointment ahead of time. It’s a great option for those who want to get rid of clutter in their homes.

There are many reasons why people might need to have their homes cleared. It could be due to a foreclosure or preparing a home for sale. Another reason may be clearing out a home after the death of a loved one. The thought of throwing away the deceased’s possessions can be painful, but junk removal companies can make the process easier.

Many people are not sure how to dispose of large items. A junk removal service will pick up these items for you and dispose of them in a safe and efficient manner. Depending on your situation, you can also sell your furniture locally or online on eBay or Amazon. If you have no way to sell the items, you can also contact specialty groups that purchase used furniture.

Junk removal companies also take yard waste. Yard waste can include trees, grass, mulch, and sod. These items should not be mixed with other types of junk. There may be restrictions on the weight and size of items. It’s best to consult your local department of environmental protection before hiring a junk removal company. This will save you both time and money. They will also donate any salvageable items to charities. If you’re moving, residential junk removal services can help you get rid of unwanted items.

Junk removal costs can vary greatly. Some companies charge based on the space they have to clear, while others charge per item. A few companies charge based on volume, but most homeowners will spend anywhere from $139 to $350. The average cost of a full truckload can be up to 450 cubic feet, which is usually the maximum amount.

Hiring a junk removal service is an affordable way to get rid of your unwanted items. These services are usually more affordable than hauling your own garbage, which means that you can save a lot of money. In addition, they won’t require you to be home during the pick-up. And, if you’ve got a lot of junk to get rid of, you’ll have peace of mind that the company will do the work, leaving you free to relax or go about your daily life.

When choosing a junk removal company, ask what happens to the items once they’ve been removed. A professional company should try to reduce the amount of waste they generate by donating or selling them. It’s better for the environment to donate these items rather than throw them in a landfill. The best way to find the right junk removal service is to compare a few different companies. You can also read reviews to determine how reliable they are and how much equipment they have.

Most junk removal services offer two main services: truck hauling and dumpster rentals. Different companies will charge differently for these services. Make sure to ask about each service when you get quotes. Truck hauling is ideal for quick junk removal because they will arrive with a large truck with a dumpster in the back. The haulers will load the items onto the truck and then drive them away.

Why You Should Hire an Electrician

electrical repairMany homeowners try to do their electrical repairs, but they can often fail. Aside from the inconvenience of dealing with a malfunctioning circuit, improper wiring can be a safety hazard and can cause a fire if it is not repaired quickly. Call a professional electrician to check the wiring and identify any problems when you suspect that you need to have your electrical system repaired. You will need the services of an expert to ensure that all electrical parts are functioning correctly.

The electrical system is an intricate network of connections and components that must work in harmony to provide a high-quality service. If you have an issue with your electrical system, you should contact  Electrician for assistance. An electrician will be able to diagnose and repair the electrical system in your home. They can help you with basic repairs and major electrical installations. If you are having trouble with your electricity, you can also have an electrician come to your home and solve the problem.

An electrician is an excellent choice if you have an electrical emergency. An electrician will be able to properly diagnose the problem and determine the cost of electrical repairs. A trained professional will be able to properly assess the damage and determine if it can be repaired. The cost of the electrical repairs you need depend on the type of electrical system that you have and the complexity of the project. An electrician can determine whether you need a new breaker, socket, or outlet.

While you may think that you know what the problem is, it’s important to know that the cost of repairs will depend on the severity of the problem. An electrician can diagnose and fix the problem before any further damage is done. During a power outage, for example, the company’s electrician can determine if your electrical system is at fault, or whether you have a wiring issue. If a new circuit is needed, they will use a licensed professional to determine how much the project will cost.

If you notice that a certain electrical component is damaged, you should contact an electrician to repair it. A qualified electrician will be able to diagnose the problem and fix the problem. You should also make sure to get more than one estimate when it comes to electrical repair. A professional can also determine if an electrical issue is a safety concern. If your electrical system has a lot of dangerous wires, you should hire a professional to check it.

In most cases, the cost of electrical repairs is determined by the type of electrical equipment you use. A professional electrician can diagnose and fix problems related to wiring and other electrical systems. The job will be done according to your specifications and budget. However, some parts of your electrical system may not be functioning properly. It’s best to call a certified electrician if you’re unsure. This way, you can be sure that the problem is not a safety hazard.

An electrical repair company should be able to diagnose the problem and fix it properly. During a repair, they will be able to fix any problem with your electrical system and save you money. You should also be prepared for an electrical emergency. If you’re not sure what to do, you should call an electrician immediately. You’ll want to have your home checked by a professional before it costs you anything. A licensed electrician should be able to help you with your electrical system if it has problems.

A professional electrician can also help you with electrical repairs. A skilled electrician will be able to diagnose and repair electrical problems. The main reason to call an electrician is to prevent a power blackout. This could impact your operations. An expert can also help you avoid any safety hazards. During an electrical repair, the expert will check your wiring to determine which components are at fault. If you do, you should contact the local electricity company’s licensed electric contractor as soon as possible.

You should also consider hiring a professional electrician if you need a major electrical repair. These professionals are skilled in handling electrical issues and will be able to help you make sure that your electrical system is functioning properly. An electrician will be able to diagnose and repair any problems that you have with your electrical system. An experienced electrician can also help you save money by installing new wiring. Hence, it is essential to call an electrician if you are unsure of what the problem is.